

Homemade yogurt has never been easier to make! This Instant Pot yogurt recipe simplifies the process, giving you creamy, delicious results with minimal effort, anyone can whip up creamy, delicious yogurt right in their kitchen. This guide breaks down every step of the process, from boiling the milk to customizing your flavors, ensuring you have a foolproof method to make yogurt.
In this article, you’ll discover:
- Why making yogurt in an Instant Pot is easier, cheaper, and healthier than store-bought options.
- The essential tools and ingredients you need to get started.
- A detailed, step-by-step recipe for the perfect Instant Pot yogurt recipe.
- Troubleshooting tips for common mistakes and how to fix them.
- Ideas to flavor and customize your homemade yogurt.
Let’s dive into why the Instant Pot is your best friend for creating yogurt at home!
Why Make Yogurt Using an Instant Pot Yogurt Recipe?
Cost Efficiency Compared to Store-Bought Yogurt
If you’ve ever glanced at the price of store-bought Greek or organic yogurt, you’ll notice it’s not exactly budget-friendly. But making yogurt at home? A game-changer. With just two simple ingredients—milk and a yogurt starter—you can create quarts of yogurt for a fraction of the cost. For example, a gallon of milk costs roughly $3-$4 and yields about 16 cups of yogurt. Compare that to spending $1-$2 per cup of store-bought yogurt—it’s a no-brainer!
Plus, you can save even more by using some of your homemade yogurt as a starter for future batches.
Control Over Ingredients for a Healthier Option
One of the biggest benefits of a homemade Instant Pot yogurt recipe is knowing exactly what goes into your food. Say goodbye to artificial sweeteners, preservatives, and hidden sugars!
With homemade yogurt, you:
- Control the fat content by choosing whole milk, low-fat, or even dairy-free options.
- Add sweeteners like honey, maple syrup, or fresh fruits after the yogurt is made.
- Enjoy a naturally creamy texture without stabilizers or additives.
It’s also the perfect option for anyone with dietary restrictions since you can experiment with dairy-free alternatives like soy or coconut milk.
Hands-Off Process with Foolproof Results
Worried about messing it up? Don’t be! The Instant Pot takes all the guesswork out of yogurt-making. Its unique yogurt function maintains the precise temperature needed for culturing, ensuring smooth and consistent results every time.
Once you set it up, the process is almost completely hands-off. Let the Instant Pot do the work while you focus on other things—perfect for busy mornings or overnight preparation.
By following this guide, you’ll create yogurt that’s not only delicious but tailored to your taste preferences. Up next, let’s look at the essentials you’ll need to get started.
What You Need for Your Instant Pot Yogurt Recipe
Essential Ingredients for Homemade Yogurt
Before diving into your Instant Pot yogurt recipe, let’s talk about the essentials. The beauty of this recipe lies in its simplicity—two ingredients are all you need:
- Milk: Any type of milk works, but the higher the fat content, the creamier and richer your yogurt will be. Whole milk is the top choice for a thick, luscious texture, but low-fat or skim milk works well, too. If you’re looking for a dairy-free option, coconut milk or soy milk can also be used—just ensure it’s unsweetened.
- Yogurt Starter: You’ll need yogurt with active bacterial cultures, usually listed as Lactobacillus bulgaricus or Streptococcus thermophilus on the label. A plain, unsweetened store-bought yogurt works perfectly. Pro tip: Once you’ve made your first batch, save a bit as a starter for the next!
These two simple ingredients combine to give you fresh, homemade yogurt without any artificial stabilizers or additives.
Tools and Equipment Checklist
To ensure your yogurt turns out perfect every time, here are the must-have tools:
- Instant Pot with a Yogurt Function: This function keeps the milk at a consistent temperature for culturing, making the process foolproof.
- Digital Thermometer: This is essential for checking milk temperatures during boiling and cooling.
- Cheesecloth (Optional): If you’re a fan of Greek yogurt, you’ll need cheesecloth to strain out the excess whey.
- A Ladle and Whisk: These help you mix in your yogurt starter evenly and smoothly.
With these ingredients and tools, you’ll be ready to whip up a delicious Instant Pot yogurt recipe like a pro!
Optional Additions for Enhanced Flavor
The base yogurt is fantastic on its own, but if you want to level it up, consider these optional flavor boosters:
- A splash of vanilla extract
- Natural sweeteners like honey or maple syrup
- Fresh fruits, jams, or preserves stirred in before serving
These add-ons let you customize your yogurt to suit your taste buds perfectly. Ready to get started? Let’s walk through the step-by-step process!
Step-by-Step Instant Pot Yogurt Recipe Guide
Step 1: Prepare and Sterilize the Instant Pot
Before starting, it’s crucial to ensure your Instant Pot is clean and sterile. Any residue or bacteria can interfere with the culturing process. Here’s what to do:
- Add 2 cups of water to the Instant Pot.
- Close the lid, set the vent to “Sealing,” and run the pot on high pressure for 3 minutes.
- Allow a natural pressure release, empty the water, and wipe the pot clean.
This step ensures you’re starting with a pristine surface for your yogurt starter.
Step 2: Boiling the Milk to the Right Temperature
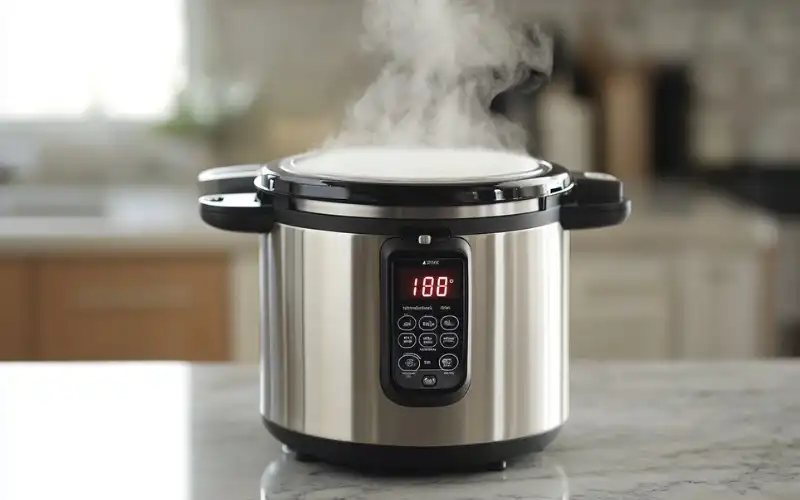
Pour your milk into the Instant Pot and place the lid on. Don’t worry about whether the vent is sealed—it’s not necessary here.
- Press the “Yogurt” button and adjust until the display says “BOIL.” This will heat the milk to between 180°F and 200°F.
- When the Instant Pot beeps, check the temperature with a digital thermometer. If it hasn’t reached 180°F, turn on the sauté function to heat it up further while stirring occasionally.
Why boil the milk? This step kills any unwanted bacteria and prepares the milk proteins to set properly.
Step 3: Cooling the Milk to Activate Cultures
Once the milk is heated, the next step is cooling it to a temperature that won’t kill the active cultures. Here’s how:
- Allow the milk to cool naturally for 1-2 hours, or speed it up by placing the inner pot in an ice water bath.
- Monitor the temperature carefully—it needs to drop to between 110°F and 115°F.
At this point, the milk is ready for the yogurt starter.
Step 4: Adding the Yogurt Starter
To avoid clumps, follow these steps for incorporating your starter:
- Scoop out a small amount of warm milk into a bowl.
- Add 2-3 tablespoons of plain yogurt (your starter) and whisk until smooth.
- Pour the starter mixture back into the pot and whisk thoroughly to combine.
By doing this, you’ll evenly distribute the active cultures, ensuring your yogurt sets beautifully.
Step 5: Incubating the Yogurt in the Instant Pot
Place the inner pot back into the Instant Pot and close the lid. Again, the vent setting doesn’t matter.
- Press the “Yogurt” button and set the timer for 8 to 12 hours. A shorter time will yield a milder yogurt, while a longer incubation creates a tangier, thicker result.
The Instant Pot now works its magic, maintaining the perfect temperature for the yogurt cultures to thrive. Once the time’s up, you’ll have yogurt that jiggles like jello.
Step 6: Cooling and Storing Your Homemade Yogurt
At this stage, your yogurt needs to cool and set up further. Here’s what to do:
- Transfer the pot to the fridge or spoon the yogurt into airtight containers.
- Chill for at least 4 hours, or overnight, for the best texture.
Once cooled, give the yogurt a good stir before serving. If you prefer a thicker consistency, proceed to strain it for Greek yogurt (we’ll cover this in the next section).
By now, your Instant Pot yogurt recipe is complete. You’ve just made creamy, delicious yogurt with little effort and no fancy gadgets. Serve it with toppings of your choice, or use it in smoothies, baking, or dressings!
Customizing Your Instant Pot Yogurt
How to Flavor Your Yogurt
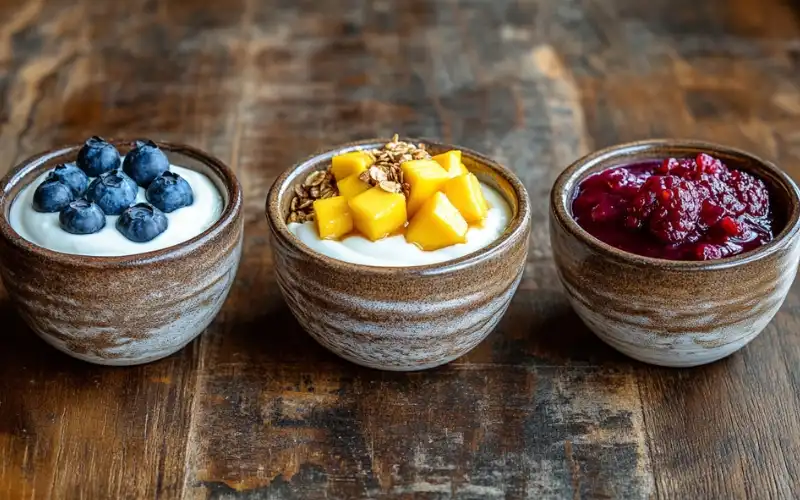
Once your Instant Pot yogurt recipe is complete, the fun begins—customizing the flavors! While plain yogurt is versatile and healthy, a little touch of sweetness or tang can elevate it. Here are some quick ideas to add flavor:
- Vanilla Yogurt: Mix 1 teaspoon of vanilla extract into a cup of yogurt. Add a drizzle of honey or maple syrup for a touch of natural sweetness.
- Fruit-Packed Yogurt: Stir in fresh fruit like berries, diced mango, or bananas. You can also use jam or fruit preserves for a burst of flavor.
- Chocolate or Cinnamon Swirl: Add a sprinkle of cocoa powder or cinnamon, and a teaspoon of sugar or sweetener to balance the flavors.
Pro Tip: Flavor your yogurt after it has chilled. Adding ingredients beforehand may interfere with the yogurt’s texture during the incubation process.
Making Greek Yogurt or Thick Yogurt
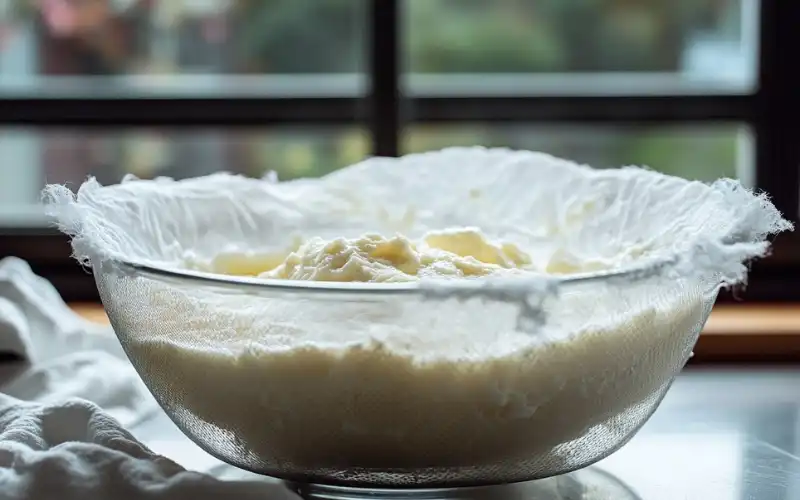
Do you prefer thick, creamy yogurt similar to what you’d find in a store? Turning your homemade yogurt into Greek yogurt is super easy.
Here’s how:
- Place a large strainer or colander over a bowl.
- Line it with cheesecloth or a clean dish towel.
- Pour the yogurt into the strainer and let it sit for 2-6 hours in the fridge. The longer you strain, the thicker the yogurt.
What happens here is that the liquid whey drains out, leaving you with a creamier, more concentrated yogurt. The whey can be saved for smoothies or baking—it’s packed with protein!
Storing and Freezing Yogurt
- Refrigeration: Your homemade yogurt will stay fresh in the fridge for 7-10 days. Store it in airtight glass jars or containers to maintain its quality.
- Freezing: Yes, you can freeze yogurt! Use small portions for convenience, and thaw it overnight in the fridge. The texture might change slightly, but it’s still perfect for smoothies or recipes.
For more tips on using yogurt in meals, check out this guide to Instant Pot recipes. It’s packed with ideas to inspire your cooking!
Common Troubleshooting for Instant Pot Yogurt
Why Is My Yogurt Runny or Thin?
Nothing’s worse than eagerly checking your yogurt, only to find it’s runny. Here’s why this happens and how to fix it:
- Incorrect Temperature: Adding the starter culture while the milk is too hot (above 115°F) can kill the bacteria. Always double-check with a thermometer.
- Too Little or Too Much Starter: If you skimp on the starter, the yogurt may not set. On the other hand, using too much can cause the bacteria to compete, resulting in thin yogurt. Stick to the recommended 2-3 tablespoons per quart of milk.
- Short Incubation Time: Let the yogurt sit in the Instant Pot for at least 8 hours. For a thicker, tangier result, incubate for up to 12 hours.
What Happens If the Yogurt Doesn’t Set?
Don’t worry—your efforts aren’t wasted! If the yogurt hasn’t set after 8-12 hours, try these fixes:
- Reincubate: Set the Instant Pot for another 2-4 hours on the Yogurt function.
- Add More Starter: Whisk a tablespoon of fresh yogurt starter into the mixture and restart the incubation process.
If all else fails, you can use the runny yogurt as a base for smoothies, dressings, or even baking. It still has all the nutritional benefits!
Avoiding Common Mistakes
To ensure a perfect Instant Pot yogurt recipe every time, keep these tips in mind:
- Always clean and sterilize the Instant Pot thoroughly before starting.
- Monitor the milk’s temperature closely during both the heating and cooling stages.
- Use plain yogurt with live active cultures—flavored yogurt won’t work as a starter.
With these troubleshooting tips, you’ll soon become a yogurt-making pro! Whether it’s a thick Greek yogurt or a silky-smooth base for recipes, you’ll love the results.
FAQs About Instant Pot Yogurt Recipe
How Long Does Instant Pot Yogurt Last?
Homemade yogurt stays fresh for 7-10 days when stored properly in the refrigerator. Use airtight containers or glass jars to maintain its creamy texture and flavor. For the best results, keep it chilled and always use a clean spoon to avoid contamination.
If you want your yogurt to last longer, you can freeze it for up to one month. While freezing may slightly change the texture, it’s still perfect for smoothies, baking, or as a starter for your next Instant Pot yogurt recipe.
Can I Use Plant-Based Milk for Instant Pot Yogurt Recipe?
Yes! If you prefer dairy-free yogurt, you can use plant-based options like soy milk or coconut milk. However, make sure the milk is unsweetened and free of additives. Some non-dairy milks may require thickeners like agar-agar or cornstarch to achieve the right texture.
For those using almond milk or oat milk, results may vary since they lack the protein found in dairy milk. Experiment with different brands and ratios until you achieve the creamy consistency you desire.
Can I Freeze Yogurt for Later Use?
Absolutely! Freezing yogurt is a great way to extend its shelf life or save starter culture for future batches. To freeze, portion the yogurt into small airtight containers or ice cube trays. When you’re ready to use it, let it thaw in the refrigerator overnight.
Frozen yogurt works especially well in smoothies, baking, and dressings. It’s also perfect for making frozen yogurt desserts—a refreshing treat on warm days!
Is It Safe to Use Raw Milk in an Instant Pot?
While it’s possible to use raw milk, it’s trickier than pasteurized milk. Raw milk contains natural bacteria that can compete with the yogurt cultures, leading to inconsistent results. If you decide to use raw milk, make sure to boil it to 180°F first to kill unwanted bacteria, then cool it down before adding the starter.
If you prefer a foolproof method, stick to pasteurized milk for your Instant Pot yogurt recipe. It’s reliable, safe, and yields consistent results.
Delicious Recipes Using Homemade Yogurt
Frozen Yogurt and Smoothies

Homemade yogurt makes the perfect base for frozen desserts and smoothies. Its creamy texture and natural tang add depth to any recipe. Try these simple ideas:
- Frozen Yogurt: Mix 2 cups of yogurt with 1/4 cup of honey and a splash of vanilla. Freeze for 2-3 hours, stirring every 30 minutes for a soft-serve consistency.
- Green Smoothie: Blend a cup of yogurt with fresh spinach, a banana, and a handful of frozen mango. It’s nutritious, refreshing, and packed with flavor.
Whether you’re craving a healthy snack or a cool dessert, homemade yogurt has you covered.
Baking Recipes with Yogurt
Did you know yogurt can replace ingredients like sour cream, butter, or oil in baking? Its tanginess adds flavor, while its moisture ensures soft, fluffy results. Use it in:
- Muffins and Cakes: Add yogurt to your favorite muffin or banana bread recipe for extra moisture and protein.
- Pancakes or Waffles: Substitute half the milk in your batter with yogurt for fluffy, protein-packed breakfasts.
For an indulgent twist, check out this delicious Chocolate Chip Banana Bread Recipe. It’s perfect for using up extra yogurt!
Yogurt-Based Dressings and Sauces
Homemade yogurt shines in savory recipes, too. Its smooth texture and tangy flavor make it ideal for dressings, marinades, and sauces. Try these easy options:
- Cucumber Yogurt Sauce: Combine yogurt with grated cucumber, garlic, and fresh dill for a refreshing tzatziki. Perfect as a dip or alongside grilled meats.
- Yogurt Salad Dressing: Whisk together yogurt, olive oil, lemon juice, and a pinch of salt for a creamy, healthy salad dressing.
For heartier meals, you can even pair yogurt with other dishes like a country style beef ribs recipe for a balanced, satisfying feast. Its cooling flavor complements rich, savory foods beautifully.
Health Benefits of Homemade Instant Pot Yogurt
Rich in Probiotics for Gut Health
One of the main reasons people turn to homemade yogurt is its probiotic power. Probiotics are beneficial bacteria that improve digestion and support a healthy gut microbiome. Unlike many store-bought yogurts, homemade Instant Pot yogurt recipe ensures you get yogurt free from artificial additives or excessive sugar.
When you make yogurt at home, you’re preserving the live and active cultures like Lactobacillus and Streptococcus. These cultures promote:
- Improved digestion and nutrient absorption
- Relief from bloating and indigestion
- A stronger immune system
Eating yogurt regularly helps maintain a balanced gut, which is linked to better overall health, from mental clarity to energy levels.
Packed with Protein, Calcium, and Vitamins
Homemade yogurt is not just tasty; it’s nutritious. A single cup is loaded with protein, which keeps you full and supports muscle health. Depending on the milk you use, it’s also a great source of calcium, essential for strong bones and teeth.
Here’s a quick look at what yogurt offers:
- Protein: Builds muscles and keeps you satisfied longer.
- Calcium: Promotes bone health and prevents osteoporosis.
- Vitamin B12: Boosts energy and supports brain function.
Whether you use whole milk for creaminess or opt for low-fat alternatives, this Instant Pot yogurt recipe makes a versatile, nutrient-rich addition to your diet. Plus, it’s naturally low in sugar unless you choose to sweeten it.
Great for Weight Management and Heart Health
Yogurt is an excellent food for anyone looking to manage their weight. Its high protein content keeps you full, reducing the temptation to snack on less healthy options. When made with whole milk, it also provides healthy fats that are linked to improved heart health.
By making yogurt at home, you’re controlling every ingredient, ensuring it’s wholesome, delicious, and tailored to your health goals.
Tips for Perfect Instant Pot Yogurt Every Time
Choose the Right Milk and Starter
The quality of your ingredients determines the success of your Instant Pot yogurt recipe. Always choose milk that suits your taste and dietary needs. Whole milk creates thick, creamy yogurt, while low-fat or skim milk yields a lighter texture.
When it comes to the starter, ensure it has live active cultures. Avoid flavored yogurts, as added sugars and artificial ingredients can interfere with the fermentation process. Plain Greek yogurt or a high-quality yogurt starter is your best bet.
Be Patient During Incubation
Patience is key to perfect homemade yogurt. The Instant Pot’s yogurt function simplifies the process, but you’ll still need to give it time. For mild yogurt, incubate for 8 hours, and for a tangier result, leave it for up to 12 hours.
A few tips to remember during incubation:
- Don’t disturb the yogurt while it’s culturing. Opening the lid can disrupt the process.
- Use a timer to stay on track and avoid over-fermentation.
- Refrigerate the yogurt immediately after incubation to set the texture.
Experiment with Flavors and Textures
Once you master the base Instant Pot yogurt recipe, the possibilities are endless. Strain it to make thick Greek yogurt, or mix in creative flavors like:
- A drizzle of maple syrup with chopped nuts
- Fresh berries and a spoonful of jam
- A pinch of cinnamon and a dash of vanilla extract
If you prefer yogurt as a savory option, stir in fresh herbs, garlic, and a squeeze of lemon for a quick yogurt dip. Pair it with recipes like grilled vegetables, flatbreads, or even hearty dishes like country-style beef ribs.
Consistency is Key
If your yogurt turns out runny or too thin, don’t worry—it happens to everyone! Here’s a quick fix:
- Strain it using cheesecloth for a few hours to remove extra whey.
- Adjust the amount of starter next time, ensuring you’re not overloading it.
By following these tips, you’ll enjoy a consistent, creamy texture with every batch of yogurt. With a little practice, you’ll perfect this Instant Pot yogurt recipe and make it a regular part of your cooking routine.